Virtual sound devices make it possible to route audio from one app to another. Say, you want to record a livestream of a press conference. A virtual audio device allows you to route the audio from your browser to your DAW. You can also use it the other way around: if you want to set up a livestream, route the audio from your DAW to the livestream or webinar app using a virtual audio device.
Market overview
Soundflower used to be the tool to achieve this, but it’s unclear if it’s still maintained and might not work with the latest macOS versions. Meanwhile, commercial tools like Rogue Amoeba’s Loopback or Audio Hijack have become popular. They provide similar functionality and more, and are loved for their ease of use.
However, new free and open-source solutions have also emerged, that are very similar to Soundflower: Ultraschall Hub and BlackHole. Ultraschall Hub installs four 2-channel (stereo) devices, while BlackHole installs one device with 16 channels that can be used by different sources.
Installation
Configuration
Open Audio MIDI Setup (in the Utilities folder on the Launchpad, or search for it in Spotlight by pressing cmd ⌘+space) and make sure the virtual device uses your preferred sample rate - likely 44,100 Hz or 48,000 Hz.
Usage
Set your virtual device as the output device on the application that you want to record, e.g. Skype. Most browsers don’t have a setting for audio output, so you’d have to change the system audio output.
Next, select the same virtual device as the input on (a track of) your DAW.
Not recording system sound effects
MacOS can distinguish between a device for general sound output and a device for system sound effects and alerts. If you only want to record one or the other, e.g. a livestream without sounds of incoming emails or calendar alerts, this can be useful.
- Open the application
Audio MIDI Setup. On the Launchpad it’s in the Utilities folder, or search for it in Spotlight (cmd ⌘+space).- If the Audio Devices window doesn’t appear automatically, open it from the Window menu or press cmd ⌘+1
- Right-click the device you want to use for general sound output and select the respective setting.
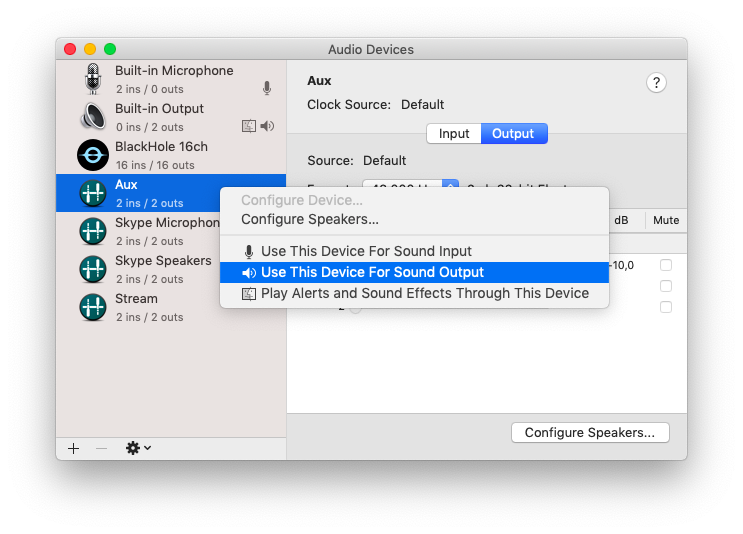
As a result, sound effects will still play on your headphones or speakers, but not appear in the recording.
Audio Monitoring
Once you’ve set up a virtual audio device, you might encounter a problem though. While the audio makes it to your DAW, you can’t hear what you’re recording.
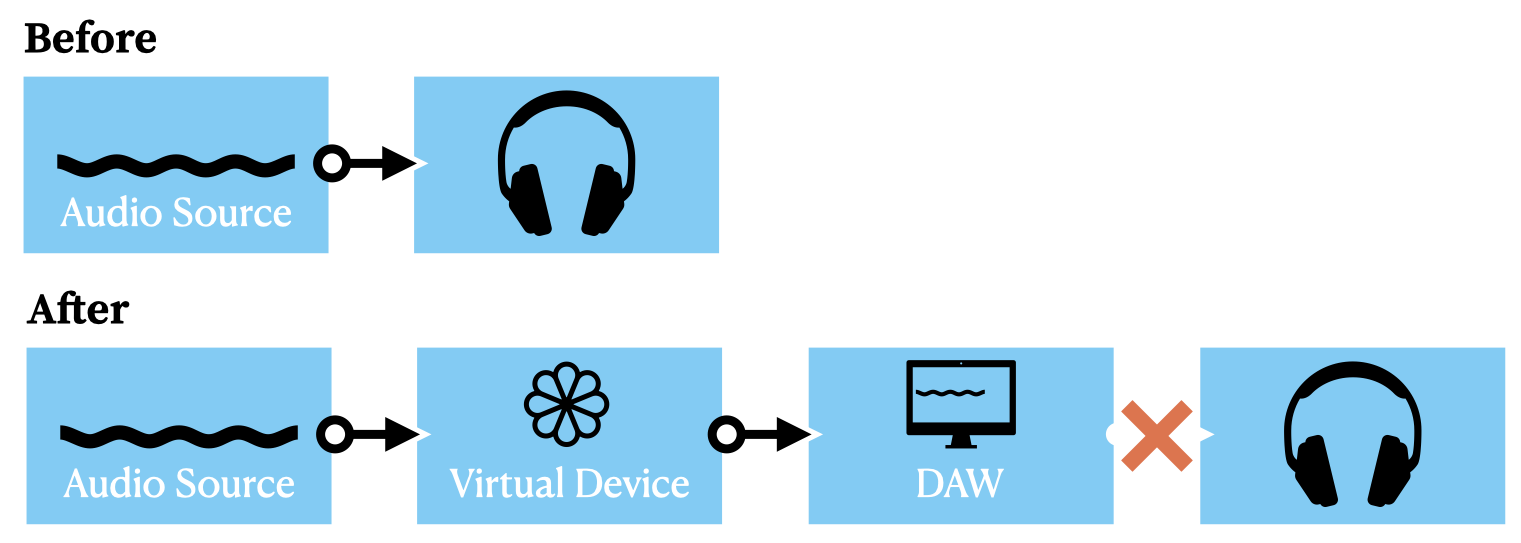
Luckily, there are multiple solutions to this:
Monitoring via DAW
Configure your DAW to pass the audio on to your headphones. It depends on your DAW if and how monitoring possible. Please add instructions for your DAW if you have them.
- Hindenburg:
- Reaper: Youtube tutorial
- ProTools: ??
- Audition: ??
Monitoring via multi-output device
Create a multi-output device that sends the audio to various destinations at once. This is something that’s built into macOS.
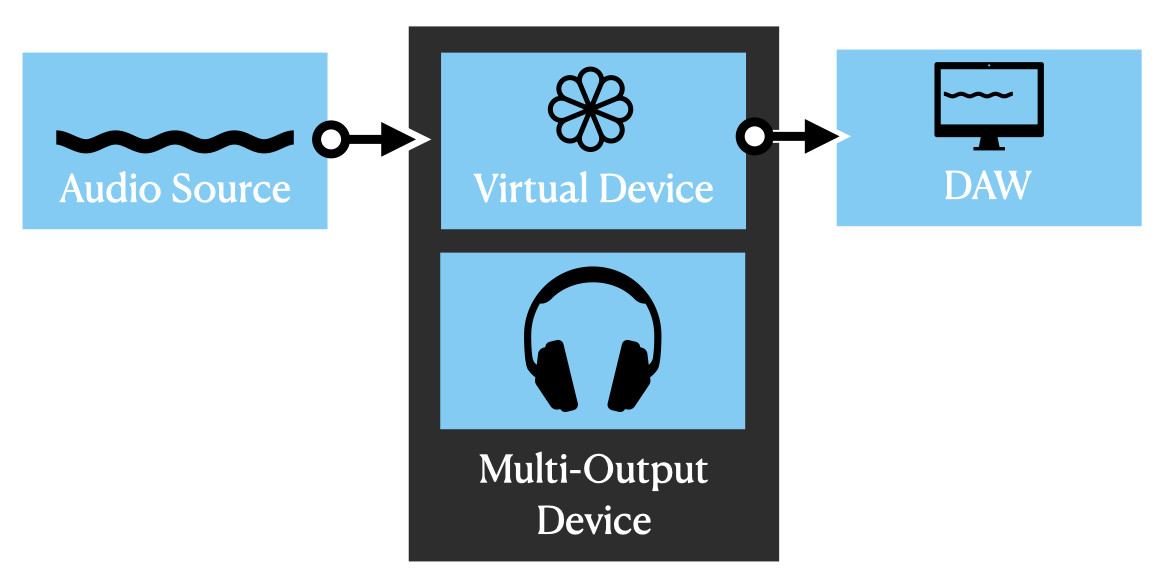
Setting this up is surprisingly easy: