If you have a Mac computer, a USB mic and an iPhone, you can use Rogue Amoeba’s program Audio Hijack and the FaceTime app to record an interview with a subject on their regular phone (landline or mobile).
Cost
US $59 for Audio Hijack
Advantages
- interface is easy to set up and use
- interview subject only needs to answer their phone (no computer with VoIP software needed)
- records separate tracks for incoming and outgoing audio
- uses your existing phone service so no need for an account with Skype etc.
Requirements
- a USB microphone
- purchase of Audio Hijack
- stable wi-fi connection
Setup
Install app
Get Audio Hijack. FaceTime is already a default app on your Mac.
Configure FaceTime to make phone calls from your iPhone
You’ll need to set up your Mac and iPhone so that you can make phone calls on the computer. All the instructions can be found at this Apple support article.
Once you’ve done that, plug in your USB mic and in FaceTime go to the Video menu; under Microphone select the name of your USB mic and under Output choose your External Headphones.
Configure Audio Hijack
In Audio Hijack, you drag components from the right-hand menu bar and drop them into the workspace; move them around like building blocks to create the recording process of your choice. Here’s the way I did it:
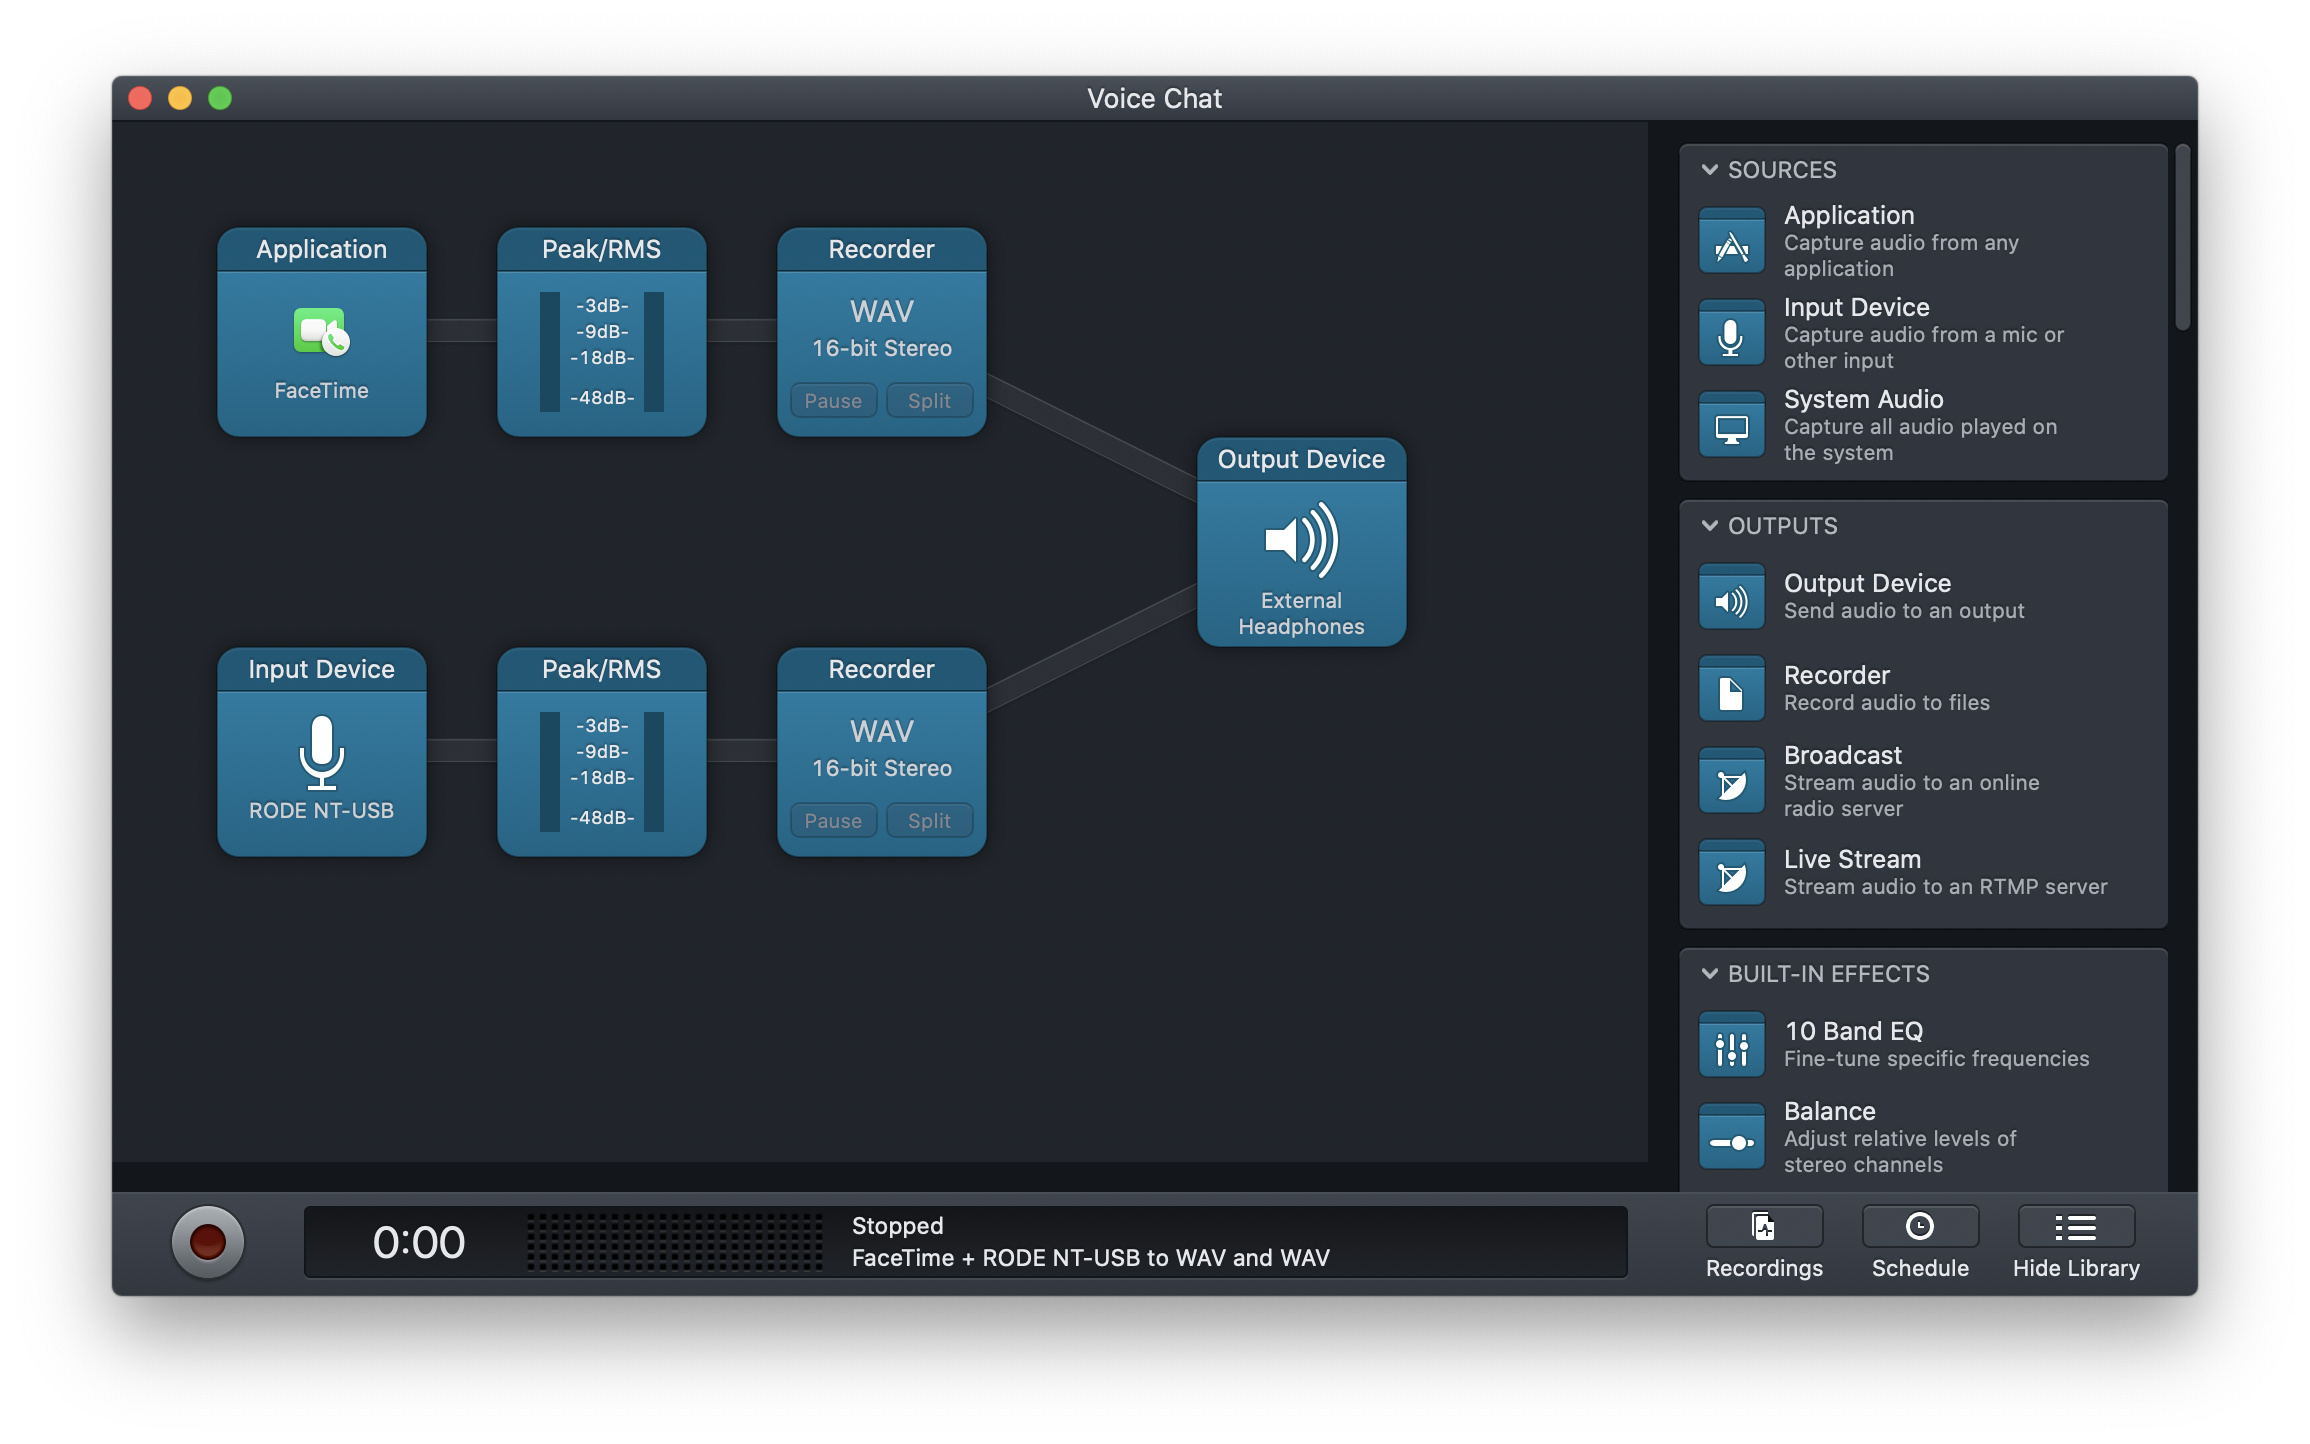
-
Choose Application (from Sources) and set it to FaceTime. Click on the box and turn off “Include audio input” from the settings. (We don’t need it since we’re going to record directly from the mic.)
-
I’ve put in a Peak/RMS Meter (from Meters; not shown in screenshot) so I can see the levels as the call is recorded.
-
Choose Recorder (from Outputs) and add it to the chain. Click on it for settings and choose your recording format, file title, metadata tags etc.
-
Choose Input Device (from Sources) and add it to another line; click on it for settings and choose your USB mic for Audio Device. Go ahead and add another Meter if you like, and finally another Recorder component so that your voice is recorded into a separate file from your interview subject’s recording.
-
Add an Output Device (from Outputs), click on it for settings and choose your external headphones. Move it to the side of both input device lines so that both inputs pass into it (meaning you can hear both your audio and theirs in your headphones).
-
You can also add a 10-band EQ component, a Low Pass Filter or other effects from under Built-In Effects.
-
If you’re hearing a delayed echo of yourself in your headphones, go to Audio Hijack > Preferences and set the Audio Processing section to “Lower Latency.”
Record the Call
Once you’ve set up Audio Hijack, go back to FaceTime, type in the phone number you want to call and hit return. You should be able to hear your subject talking through your headphones and they should be able to hear you through your USB mic.
Return to Audio Hijack and click the red record button at the bottom left. This will start recording the output from FaceTime into one file and the input from your mic into another one. When you’re finished, you can hang up in FaceTime and hit the red button again to stop recording the session.
The recorded files can be accessed from the Recordings button at the bottom right. On that window, the Actions button will let you reveal the file in the Finder or edit it in Pro Tools or whatever other DAW you select under Audio Hijack > Preferences.
Sample
Here’s a snippet of the raw recording I made of my interview subject talking on her mobile phone through FaceTime on my computer. Keep in mind this method will not sound like a studio recording; it’s obviously phone tape, but it sounds much better once you play around with EQ or a filter in your editing program.
Good to know
- You can also set the Application component in Audio Hijack to record both the input and output from FaceTime into a single stereo file (which means you don’t need to include the USB mic as an Input Device), but that will put outgoing audio on one side and incoming audio on the other channel. You can then split the stereo into two mono tracks for editing purposes. However, I prefer my method above so I can have each side of the conversation recorded into its own separate file instead.
- See also Rogue Amoeba’s support articles for Audio Hijack.