Adapted from a guide for Radiolab, WNYC Studios
These instructions are not yet field-tested and there are surely errors and omissions. Please leave a comment or edit this post.
Logging In / Preparations
-
Close all unnecessary tabs and software programs.
-
If you have the ability to plug your computer into your internet router via an ethernet cable, do so (and then turn off your wi-fi). If not, do what you can to ensure the most reliable wifi connection possible.
-
Goto https://ipdtl.com in Chrome or Firefox (Safari is not supported)
- If you have connectivity issues you can also try the custom ipDTL dedicated browser.
-
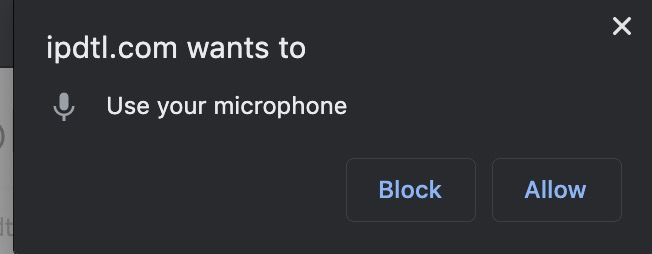
If Chrome asks permission to access your microphone, accept.
Audio Setup
Template
This guide assumes you’re in the “2 x Remote” setting found on the very top of your screen assuming your call includes you, a guest, and a 2nd producer, editor, or 2nd guest.
Unfortunately the 1 X remote setting doesn’t allow for split-track recording and you should avoid using it at this time.
The “Podcast” setting, as well as “Studio” and “Screening” settings are misleading and actually intended for live call-in shows.

Input
-
On the left, beneath the IP DTL logo, select your audio interface / USB Microphone under the “Send Audio” option.
-
If you have no external microphone or audio interface, set this to “Internal Microphone: Built In” or the equivalent option.
-
When you tap your mic, you should see the bar under this option illuminate.
Output
If you are connecting ipDTL into protools, skip below to the advanced instructions. Otherwise, if you are recording directly in ipDTL…
-
On the left, beneath the IP DTL logo, select your audio interface under the “Receive Audio” option.
-
If you have no audio interface, and are using headphones plugged directly into your computer, set this to “Internal Speakers: Built In” or the equivalent option.
Audio Quality
The sliding bar between “Send Audio” and “Receive Audio” can remain at 128 kbps. If you have connection issues you can slide this down slightly at the expense of audio quality.
Testing Your Audio
-
Click on the “Destinations” icon.
-
Under your Account Name (Radiolab), click on “Tone”
- After a few seconds you should hear an ear-splitting and endless beep.
- Press the large stop icon to stop it
-
Under your Account Name (Radiolab), click on “Echo”
- Speak into the mic. What did you have for breakfast?
- After 5 seconds you should hear yourself speaking.
- Press the large stop icon to stop it
-
Congrats! You’re ready to rock and roll.

Connecting to Guests
Connecting to guests by phone
-
Click on the “Dialpad” icon.
-
Dial the number of your guest.
- If dialing an international number*, use the “+” sign followed by the country code, NOT 011 as you would on a landline.
-
Press “Connect” to dial them. It takes a moment to connect and start ringing their line. After a few moments, you should be connected.
Your guest may see an incoming call with a caller ID that says “Ipdtl Tel”
Connecting to guests by web
-
Click on the “Link” icon.
-
Copy and Paste the URL listed beneath “SEND A LINK” and provide to your guest. Instruct them to follow the clear instructions onscreen to:
- Allow ipDTL permission to access their computer’s microphone.
- Enter their name
- Set their microphone. (They should see a bar move when they talk)
- Set their headphones. (They have the option to test with an echo relay or tone)
-
Once they’re set up, they’ll get a message that they’re connected.
-
Click on the “Destinations” icon.
-
Click on your newly appeared guest’s name.
THEY ARE NOW CONNECTED. Remember to make sure they’re wearing headphones to avoid any echos.
The Mixer Window
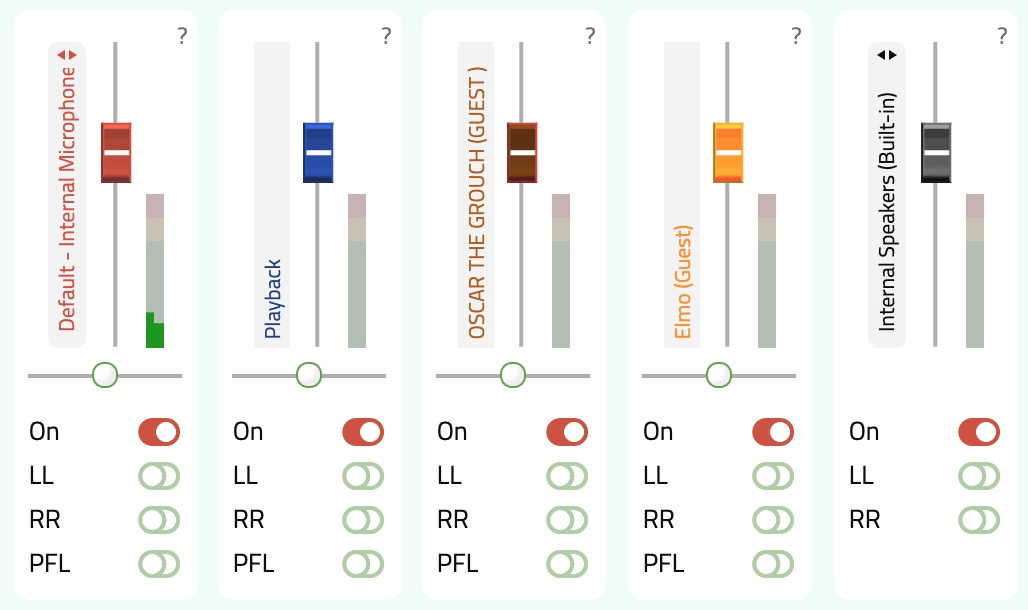
The mixer window allows you to control who hears what. Access it by clicking the “Mixer” icon
Channels
-
The left-most channel is you and your glorious voice! You should be on.
-
The 2nd channel is for playing back audio files. Chances are you don’t need to worry about this.
-
The next one to two channels are for your guests / other participants in the call. If you want someone like a remote editor to observe the conversation, but not hear them shuffling about, you can flip their channel to “off.”
-
The right-most channel is your audio output. It plays everything, except for your own mic, through your headphones and/or to Protools if you set that up.
Mixer Tips
-
You can adjust someone’s fader if they’re too loud, or too quiet.
-
If someone is only audible on the left or the right, the “LL” and “RR” switches can correct that.
Recording
Reliability Tips
ipDTL allows you to record your call without having to connect to protools or a similar DAW! That said, it’s not always the most reliable thing so I advise:
-
Connecting ipDTL to Protools if possible. (See below)
-
Treating your ipDTL like a phone sync and ensuring all sides of the conversation are being independently recorded by other means.
-
Ensuring you have ample disk space and memory for a recording. The ipDTL Developers suggest:
- 8GB Memory
- Around 100 GB of free disk space if recording a long multi-track interview.
-
Pausing to stop the recording, download, and restart recording every 10-15 minutes.
-
Close all unused browser tabs\windows and unused computer applications.
-
You can chat with other participants on your call by clicking the speech-bubble icon on the lower-right hand side.
How to record in ipDTL
-
Click on the “Play/Rec” icon.
-
Click the top-most record icon (red circle) in the green shaded area.
-
All 2-3 tracks will now start recording in sync. You will see the timecode counters start below and large blinking red dots on every track.
-
Note: the additional record icons below record specific tracks individually. The top one effectively engages all of them simultaneously.
-
-
Start any backup or local sync recordings you have the ability to make.
-
You may now proceed with the interview.
Downloading your Recording
-
Press the top-most stop icon (red square) in the shaded green area.
- Technical note: ipDTL will generate a single interleaved / “combined” audio file with 1 channel per call participant. This file is multi-channel and can be imported into Protools onto multiple mono tracks.
-
Your recording should automatically download. It might not.
-
IMPORTANT: Check your downloads to ensure the file has properly downloaded.
-
If your file has not properly downloaded, click the top most floppy-disk “save” icon located on the right side of the shaded green area.
If you would like to download separate files per call participant, you may click the respective save icons located below.
-
If you need to continue recording, DOUBLE CHECK THAT YOUR RECORDINGS HAVE PROPERLY DOWNLOADED.
-
This step deletes your recordings. After you’ve downloaded and checked your recordings, can you click the white “X” icon located on the right side of the shaded green area. THIS WILL PERMANENTLY DELETE YOUR RECORDINGS FROM ipDTL. You may now commence another recording.
Known Issues
-
“1 X Remote” mode sums both channels to one mixed file and doesn’t have a way to split-track. Even if you’re only recording one guest, I’d suggested using 2 X Remote mode at this time.
-
Internet Connection - Connection quality is indicated by the stars in the upper left hand corner of your screen. The majority of field issues we’ve encountered so far relate to poor quality connections. Use a cabled ethernet connection on a fast low-traffic network whenever possible.
-
Choppy audio - If your audio sounds choppy like you’re speaking through a helicopter rotor chances are there’s a conflict between the sample rate of ipDTL, any audio software running on your computer, and your interface. Here are some tips:
-
ipDTL suggests using a sample rate of 48k, however we haven’t found major problems when recording in 44.1 k. Just ensure all your equipment is set consistently to the same sample rate.
-
In some cases, downloading the ipDTL browser has fixed this issue.
-
If possible, instead of connecting by phone, try connecting using the “Share a link” function.
-
Briefly disconnect from your guests and try dragging the quality slider down from “128 Kbps” to “96 Kbps” or even lower if needed. Be aware this will affect the quality of your recording.
-
Quit all other audio programs not in use like iTunes or Spotify.
-
Advanced Recording with Pro-tools!
There are several approaches that allow you to connect ipDTL to Protools. All solutions require significant technical configuration but some include:
- Physically connecting the output of your audio interface to an input of your audio interface.
- Loopback by RogueAmeoba.
- Michael Raphael wrote a great guide on setting this up for advanced users here.
- Soundflower + Protools Aggregate Device
- Basic setup info here:

Because every computer, audio interface, and recording rig is so different, it’s impossible to create a single set of instructions to set this up. Please get in touch with an engineer who can set this up for you in an intuitive and reliable way that best suits your system.